
Import database using phpMyAdmin on cPanel
Import Database using phpMyAdmin
A database is a collection of information which is organized to provide efficient retrieval. Most of the databases contain multiple tables and each with different fields. You can import a SQL file to your account through phpMyAdmin. To import database using phpMyAdmin on cPanel server, find the below steps
Step 2: Select phpMyAdmin in the database section
Step 3: Redirected to phpMyAdmin Homepage. Then select the desired database in phpMyAdmin home page
Step 4: Select the option Import for importing the database
Step 6: The Selected file name will be reflected on phpMyAdmin page
Step 7: Click Go button to Execute the SQL queries
Step 8: The database is updated successfully and displays a message at the top of the page
Step 1 Login to cPanel.
Step 2 Go to Database Section. Select phpMyAdmin option in the Database section.
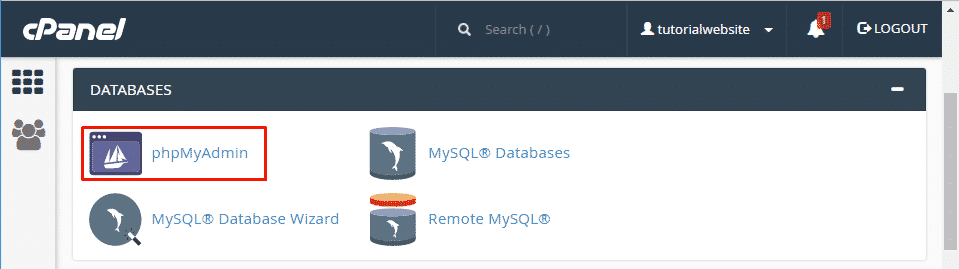
Go to Database Section Select phpMyAdmin
It has all the specific feature to manage the database.
Step 3 After clicking the phpMyAdmin. It will redirect us to phpMyAdmin Homepage. In phpMyAdmin home, select the desired database.

Select the Database
Step 4 Select import option for importing a database and it will redirect to the next page.
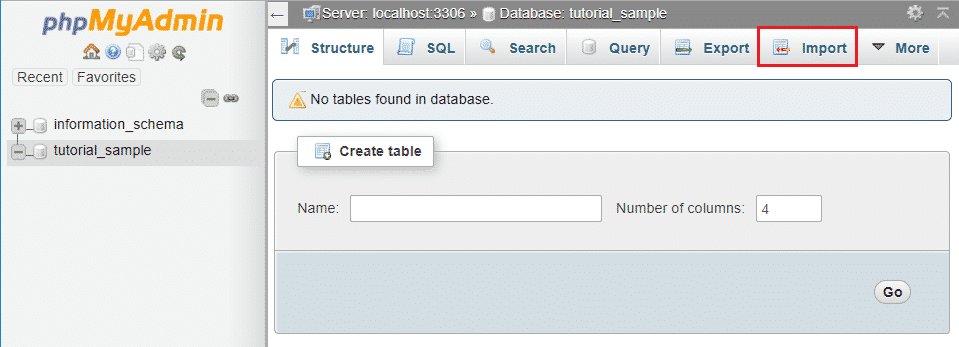
Select Import Option
Step 5 Click the option Choose File and then browse the file in local machine.

Click on Choose File Button and Browse a File
Step 6 The Selected file name will be reflected on phpMyAdmin page.

Selected File Reflected in phpMyAdmin
Step 7 Click Go button to Execute the SQL queries.
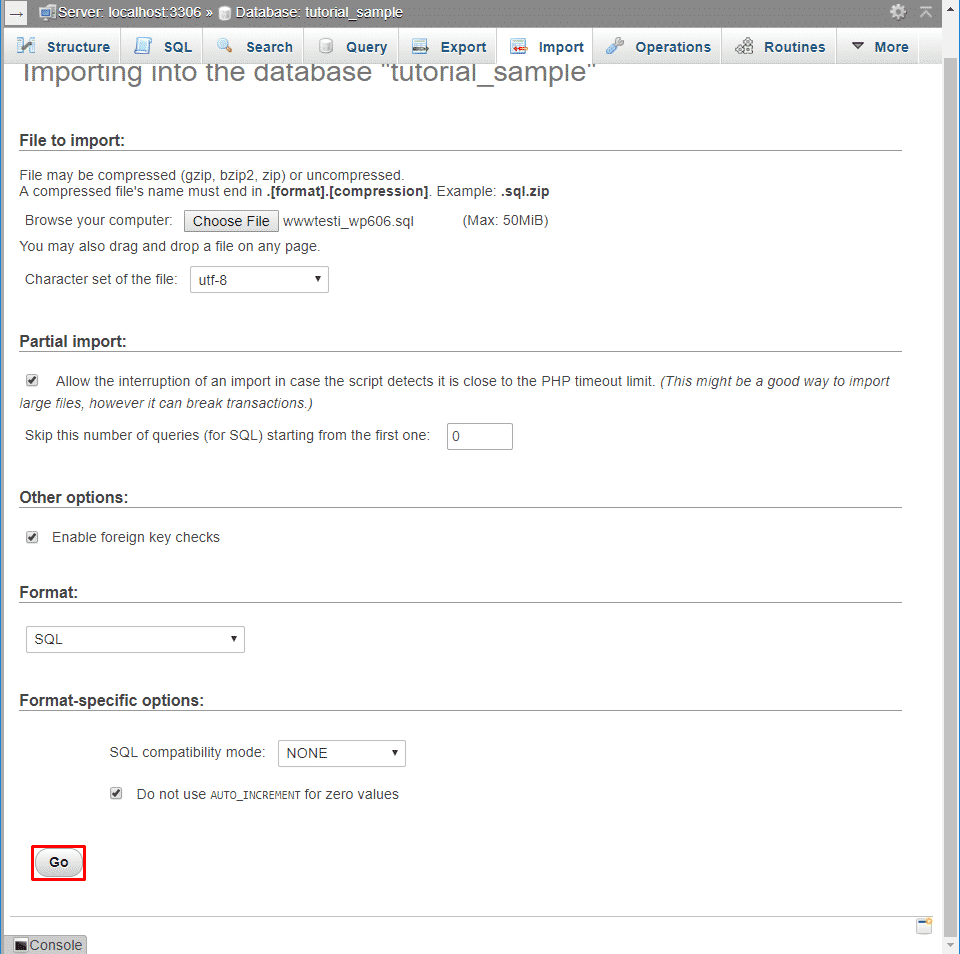
Click Go Button in phpMyAdmin
Step 8 The Database is updated and a success message is displayed at the top of the page.

Success Message is Displayed