
FileZilla:
Filezilla is a powerful software using for transferring the files over the internet which is used from all over the world. By using FileZilla you can upload the files to the website and as well as you can download the files from the website. For that, you need to configure FileZilla to your FTP account of the website. Sometimes FileZilla will throw you some errors while configuration. Connection Timeout is one of the errors occurred while configuring FileZilla. In this tutorial, we will show the steps to resolve the Connection Timeout error.
Connection Timeout Error:
When accessing the server by using FileZilla, if it shows connection timeout error, then you need to change the FileZilla settings to fix the issue.
Follow the below steps.
Step 1:
Open FileZilla FTP client.
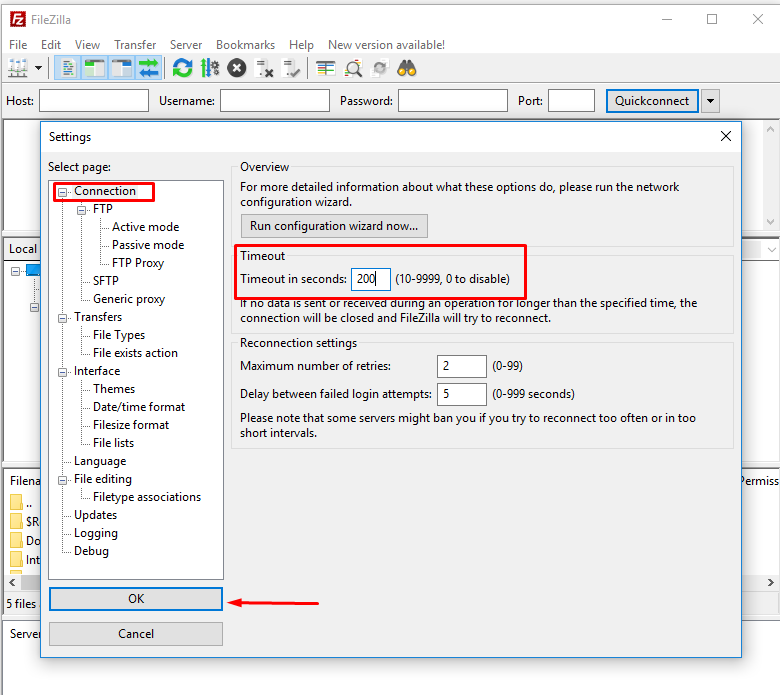
Step 2:
Click on the Edit on the top menu bar and click on the “Settings” in the drop-down bar.

Step 3:
Then click on the “Connection“. You can see the type box field “Timeout in seconds” and extend the value to 200. Then click on Ok button to save your changes.
Now try to connect the FileZilla to the server. If the error still persists, try the below method to resolve the issue.
1) Open Filezilla and click on “Site Manager” icon.

2)On the next popup window, click on “New Site” button.

3) After selecting, you need to change the “Encryption” option to “Only use plain FTP(insecure)”. Also, change the “Logon Type” to “Normal”. Fill the Hostname, User, and Password and click on the “Connect” button to proceed.

This will resolve the Connection Timeout Error on FileZilla and the connection to the server will be established successfully. If the issue still persists, contact your Hosting Provider. For more information, follow us on Twitter and Facebook. For video tutorials, subscribe to our YouTube channel “ServerCake India“.