Plesk:
Plesk is a commercial web hosting platform which allows a server administrator to manage the website files, databases, email accounts and DNS settings through a web-based interface. In Plesk, both MySQL and MsSQL databases can be managed and also allows to connect with remote database connectivity. If need to access a remote connection, we have to allow the IP address or subnet in the Firewall rules which will be disabled due to security reasons.
Remote Database Connection:
The Remote Database Access provides standard protocols for establishing a remote database connection between a database client and a database server. So, the databases can be easily accessed and managed from different locations. The list of IP addresses and the host that were allowed to access the databases remotely were managed in Plesk. The remote database access can improve the server performance, expand the server capacity and provides enhanced security. The users can be granted permission to access the database remotely.
Steps to allow remote database connection in Plesk:
Step 1: Login to the panel with the given username and password.
Step 2: Click on the option ‘Databases’ to create a new database.

Step 3: Then Go to the option ‘Add Database’ to create a new database.

Step 4: Fill the required fields such as Database name, Database server, username, password and enable the option ‘Allow remote connections from’. Then enter the IP address of the host in which the database should be connected remotely.

Step 5: Then click the option ‘OK’ in which the new database will be created and the remote connection will be enabled.

Step 6: If the database is already created, then the remote connection will be enabled with the option ‘User Management’ for the database user.

Step 7: Enter the password and choose the database and user role from the drop-down and select the option ‘Read and Write’.

Step 8: To allow the remote access, enable the option ‘Allow remote connections from’ and enter the IP address in which remote should be allowed.
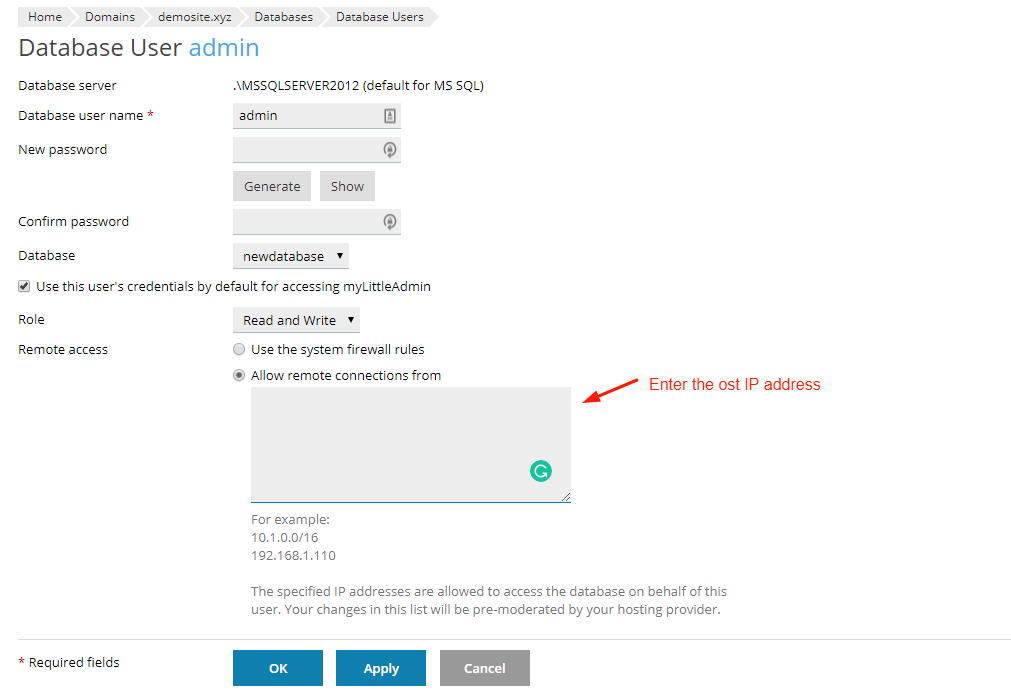
Step 9: Now, click ‘OK’ and ‘Apply’ to enable the remote access and it is successfully done.
