
Edit a file using File Manager in cPanel account
A file can be edited directly on the server using File Manager in a cPanel account. It can be done simply by using the code editor in cPanel File Manager. You can also create, edit or modify, delete a file using File Manager. To edit a file in cPanel account, follow the below steps
Step 2: Select the option File Manager under the section Files
Step 3: A list of files and folders available in the cPanel account can be viewed
Step 4: Select the respective file need to be edited from the available list
Step 7: Enter the modifications to be done and click the option “Save Changes”
Step 1 Login into the cPanel
Step 2 Click “File Manager” on the cPanel dashboard

cPanel File Manager
Step 3 It will redirect you to the new window there you can view the list of files and folders available on the cPanel account.

List of Files and Folders
Step 4 Select the respective file from the available list of files.
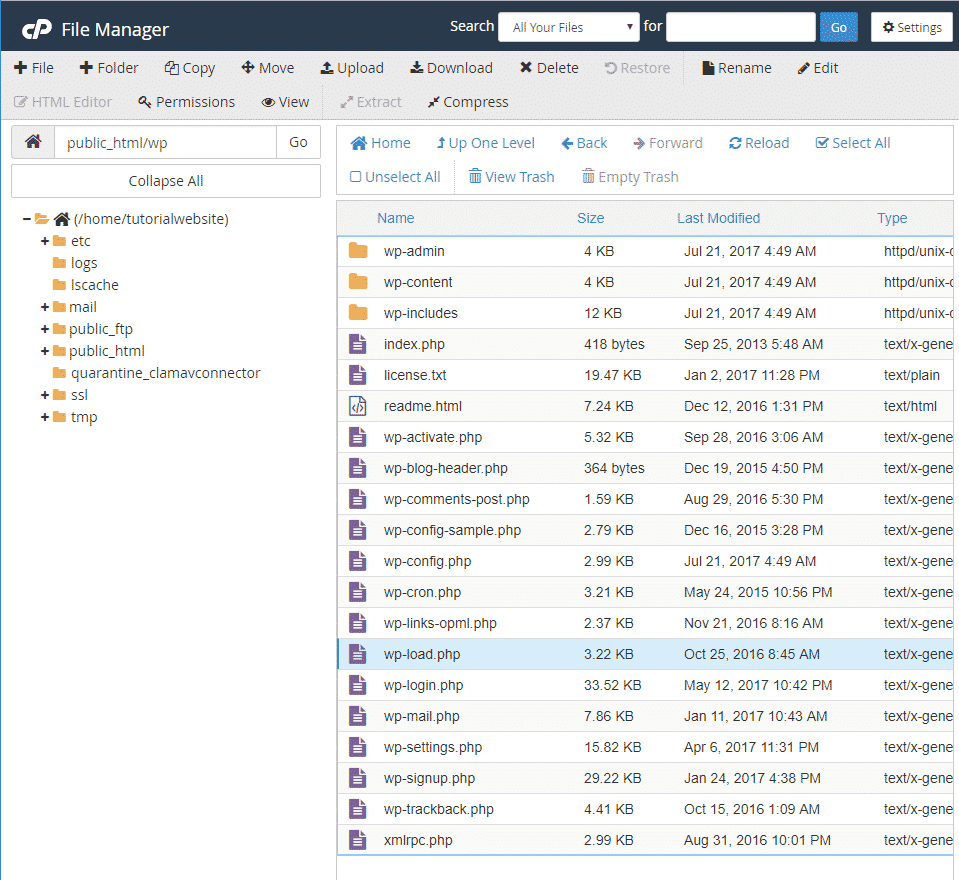
Select the respective file to edit on cPanel from the list
Step 5 Click “Edit” button at top of the page or right click the file select the option edit from the drop-down option to update/modify the content in the files.

Click Edit button/option
Step 6 Dialog box appears for acknowledging to edit the file. Click “Edit” button to continue.

Click Edit in dialog box
Step 7 Enter the new data or delete the existing data as per your wish and click “Save Changes” button at top of the page.

Enter the new text data and save the files