
WordPress uses the PHP mail function by default to send emails from contact form enquiries, registrations and about new comments. This functionality may work with a limit as most of the hosting providers have disabled the PHP mail() function on their shared servers to avoid any email abuse. And also, the PHP mail function is not a reliable method as it may deliver the emails to Spam/Junk folder and decreases the email deliverability.
The better solution is to use the SMTP server to send and receive emails which are safer than relying on PHP. The SMTP server can be integrated easily with the help of plugins such as Easy WP SMTP. Let us see the below steps to configure the SMTP server through the WordPress dashboard.
Steps to configure the SMTP Server in WordPress:
Step 1: Create an Email Account
We offer email services for each domain. So, before configuring the SMTP server, create a valid email address for your domain like ‘info@domainname.com’. It is essential to create an email account to trigger emails with a valid ‘from’ address. To know, how to create an email account in webmail, click here.
Step 2: Install the plugin ‘Easy WP SMTP’
Login to your WordPress dashboard and install the plugin Easy WP SMTP. Then activate it to configure emails with the SMTP server.
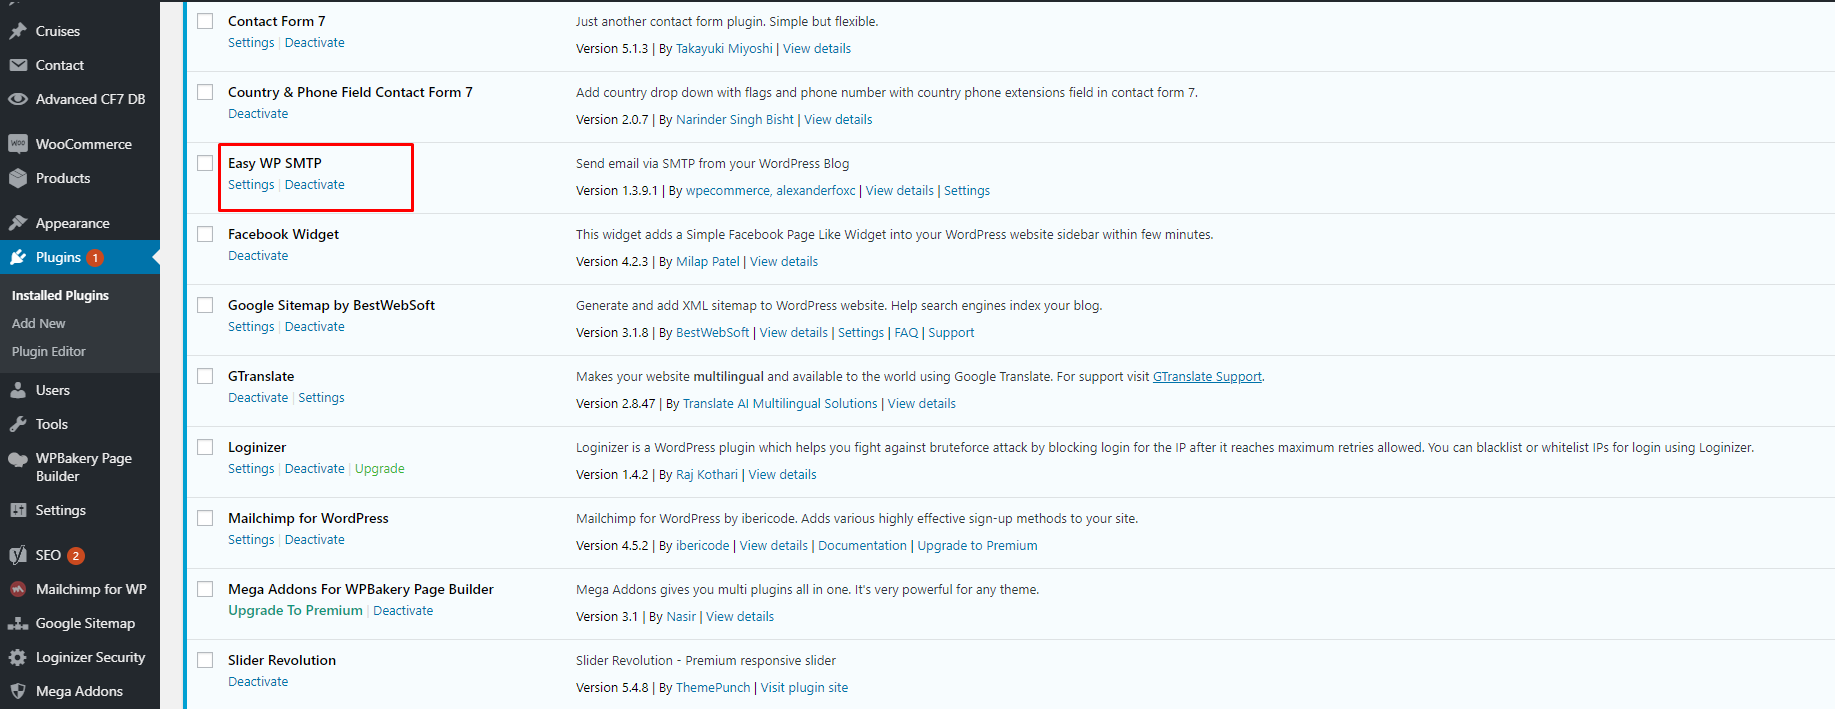
Step 3: Configuration Settings
Once the plugin is activated, go to the option Settings –> Easy WP SMTP Settings.

Now configure the SMTP settings with SMTP Server Hostname and SMTP Port number.

In the first field, enter the ‘from’ email address which was created in our server.
Then enter the From Name which will be displayed as the sender name in the email.
The option Reply-To email address is optional which can be left blank or we can use the same address as mentioned in the ‘from’ email address.
Enter the SMTP hostname as mail.yourdomainname.com (Replace yourdomainname.com with your own domain name). Then select the encryption type and enter the port number according to the type of encryption. You can use SMTP Port as 25, SSL port as 465 or 587. Contact your hosting provider for SMTP settings.
Note: If you are using other server MX records, then update the appropriate email configuration settings.
Enter SMTP Authentication as Yes. Next, enter the SMTP Username and SMTP Password.
Then click the button ‘Save Changes’.
Step 4: Additional Settings:
In this section, enable the option ‘Enable Debug Log’ to check for any errors.

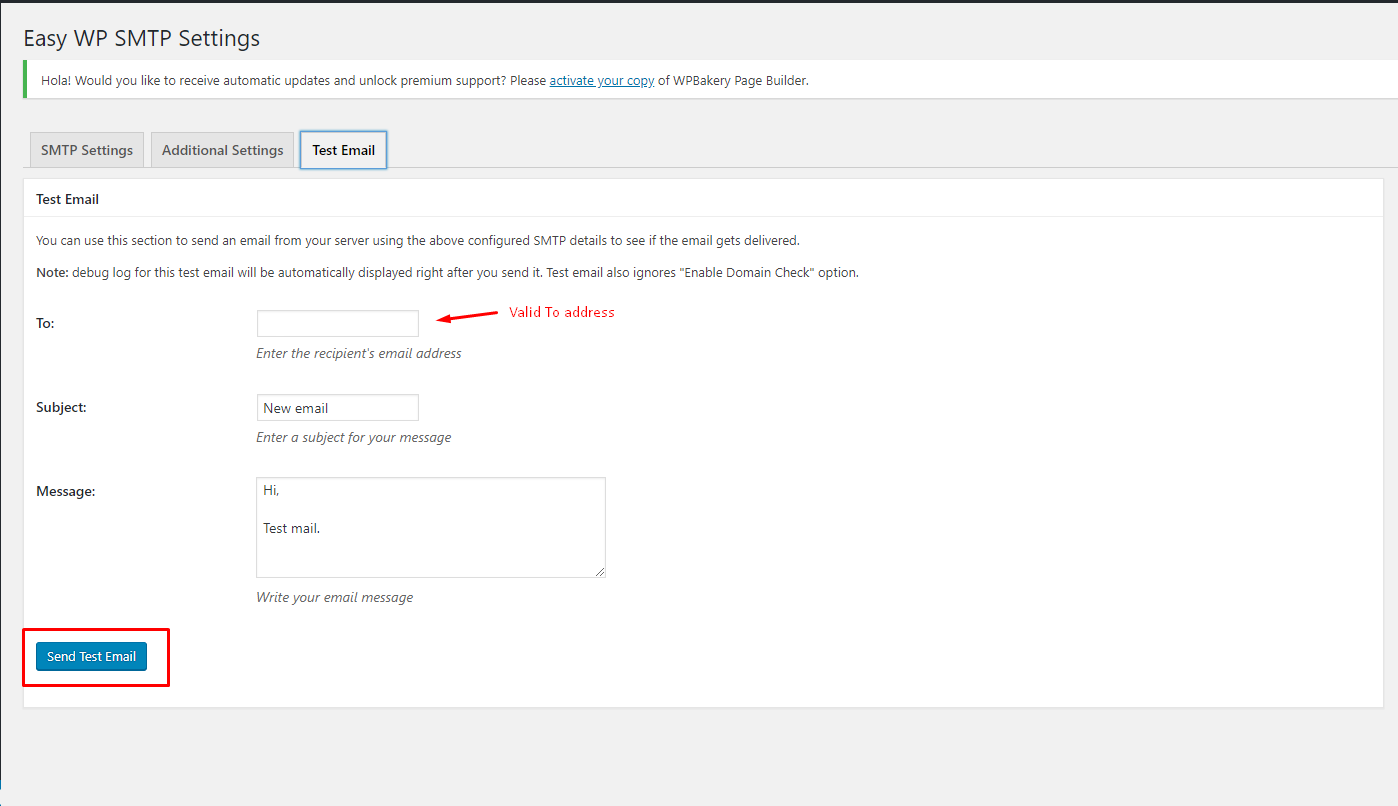
Step 5: Check Test Mail
Now, after setting the SMTP settings we can check the email functionality by testing it instantly. Click the option ‘Test Email’ and check with a valid recipient email address.
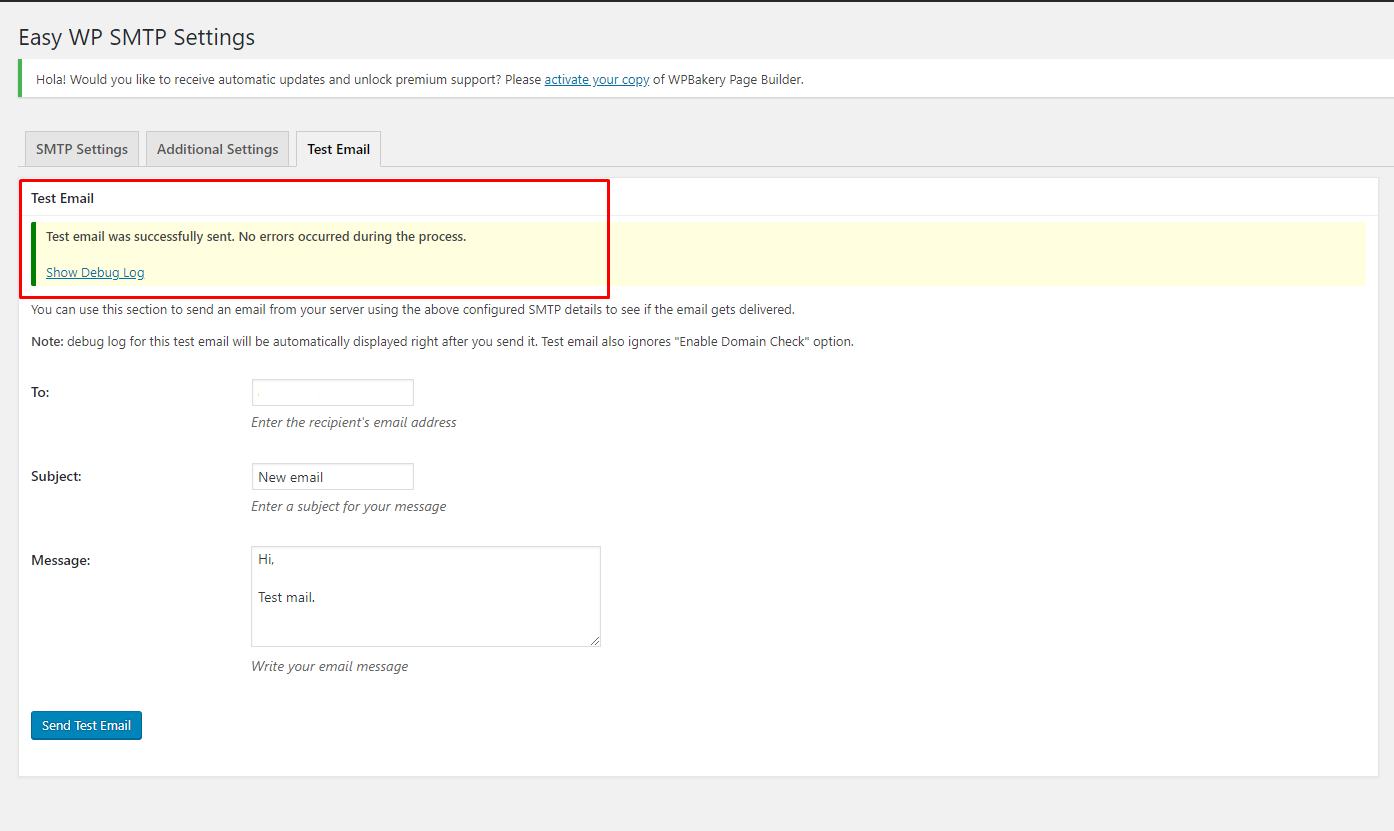
Now, when the email is sent successfully, a successful message will be displayed. If you face any error, check the email configuration settings with your hosting provider and re-test it again.
The plugin Easy WP SMTP will help to resolve the email delay issues in WordPress. We hope that this article will be helpful to fix the contact form email delay issues. For more information, follow us on Twitter and Facebook and For video tutorials, subscribe to our YouTube channel ServerCake India.