
Drop the Extra Database Tables Created by Plugins
Most of the people facing the complaint about having the poor website speed. It is important to know that when you uninstall any plugin of the WordPress, it’s may leave its tables in the database.
As I had mentioned earlier, when you install any Plugin of WordPress, depending on its functionality, it adds the tables to the database.
If it has the built-in options to delete all the settings while uninstallation, congrats you have an excellent plugin. But most of them don’t.
You have to do it manually. For which, phpMyAdmin access is required.
Step 1
Log into the cPanel of your web hosting and search for ‘Databases’ section. It will have a phpMyAdmin icon.
By clicking on the option PhpMyAdmin, you can see the database that you have created. You can easily find the Option “PhpMyAdmin” under the Databases.
Step 2
Once you open it, you will see the phpMyAdmin and on the left side menu, you will see all the names of the databases listed.
You have to click on the database on your website that is using. I hope you know it. If it doesn’t, you have to go back and to open the MySQL Wizard to see further information. It will show you all the available databases on it.
Step 3
At your phpMyAdmin database list, click on the database name and many database tables will appear to below on the database name. At the left-side menu as well as in the main box.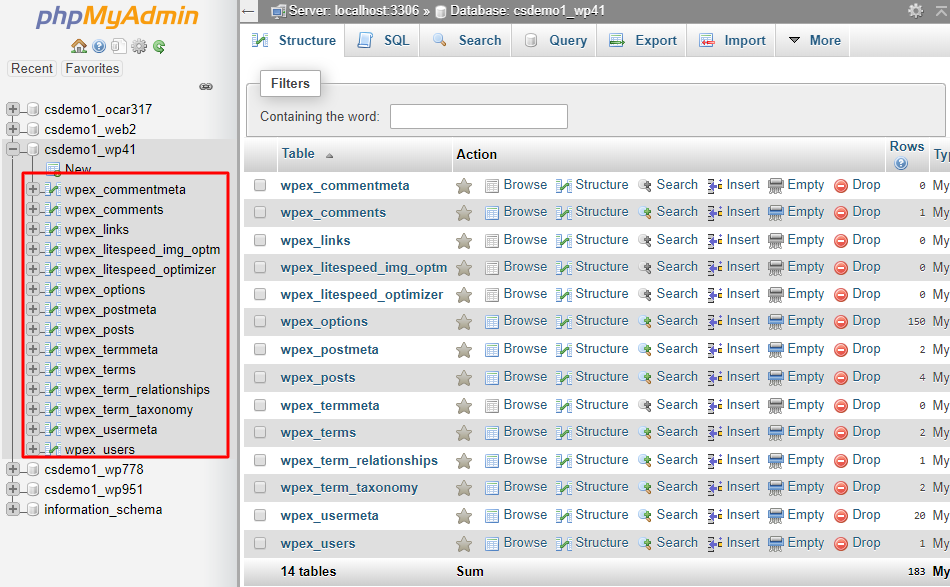
You must know that “wp_” is the default WordPress database table prefix which presents. You will see many tables in which some are the default tables whereas others are created by the plugins you have installed.
Step 4
I hope you remember the plugins you have uninstalled. It’s because the name of the database tables will be similar to the plugin name.
In this example, I am showing you the database tables created by a membership plugin. You can easily find such tables if you know the plugin’s name.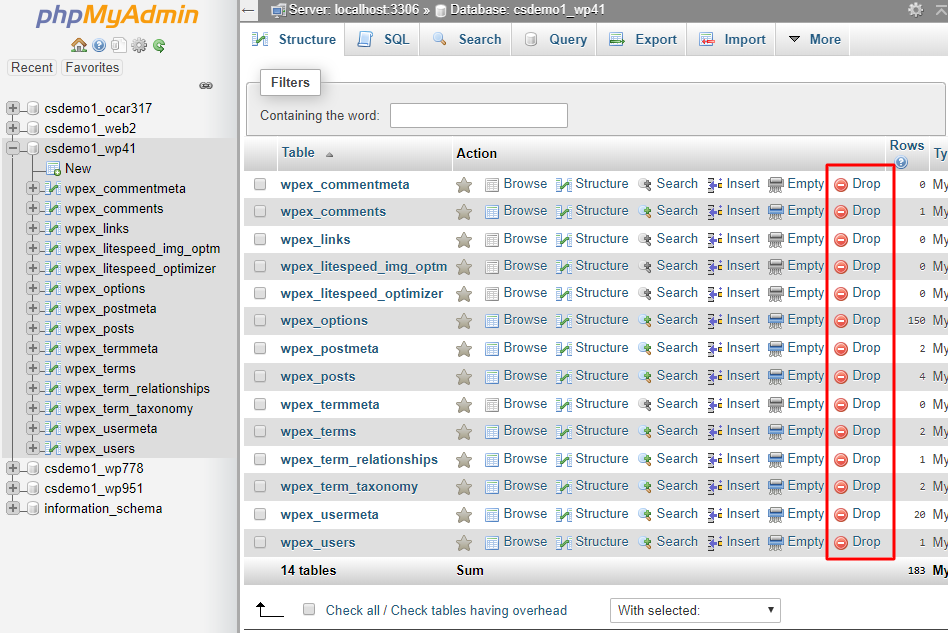
Once you did that, to delete these extra tables, you have to click on the option “drop” link or the minus sign. It will permanently delete those database tables from the Database. It means your database will be free from the extra tables which were consuming more sizes on the database.
This is the final step but it’s really important to check your website’s database if it’s working fine. For that, you have to check and repair the database tables.
Step 5
To do so, scroll down and click on the checkbox to “check all” the tables. One drop-up menu will display to apply the action to all the selected tables.
Click on Check Table and within a second, you will see the query running and its results too. If it’s green, you don’t need to worry.
But if you see any query in the red color, you have to repair it.
Step 6
To choose all the database tables and choose an action to apply. Tap on the Repair Table link in the drop-down menu and the database will get repaired.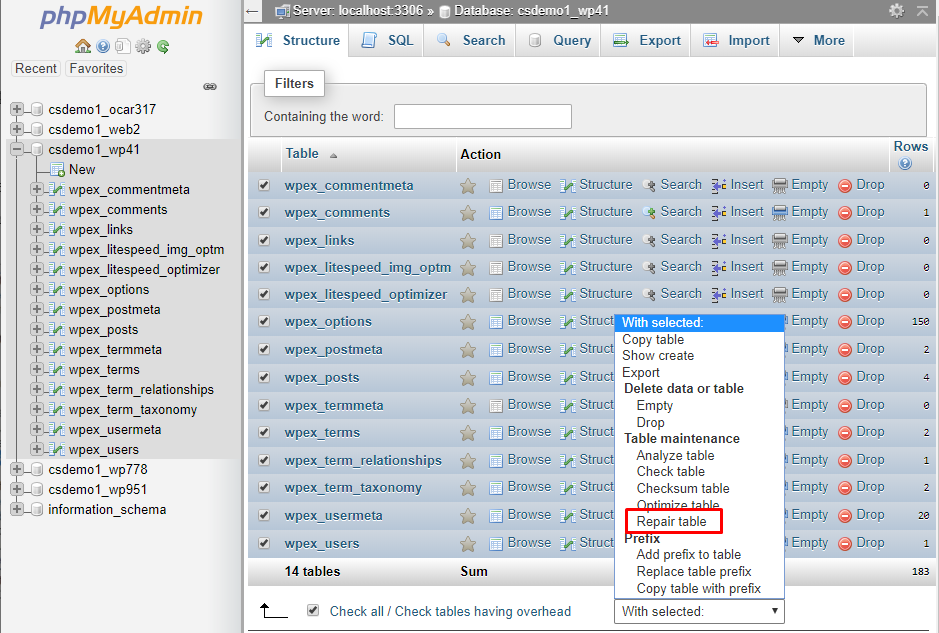
Now check your website, if it’s running correctly, you have done a great job.
If you see that it’s broken, you can always restore your database from its backup.
Now and then, it’s recommended that you should have a clear insight into the performance of your website. For the WordPress Utilizers, it is difficult to understand the database which plays a crucial role.
A few database optimization plugins remove the extra database tables to keep the size minimum as possible.
But nothing is better than doing it manually. In spite of plugins are not able to find the database tables created by the old plugins, user can use WP Sweep for optimizing website’s database.
If a user wants to test any plugin, it’s recommended to test it on the local WordPress installation.
We hope that this tutorial will help you to Delete Extra Database Tables After Uninstalling a WordPress Plugin. For more information, follow us on Facebook and Twitter. For video tutorials, subscribe to our YouTube channel “ServerCake India”.