
Backup
Backups are very important part of maintaining a website. It is important to your file and databases on a daily basis to make any major changes so that a backup is available in the event of data loss. cPanel provides a great Backup facility for the database, the user can generate the backups easily. This can be useful for backing up the valuable data from various scripts.
Steps to creating and restoring file backups in cPanel:
1. Click on the File Backups icon under the JetBackup section.

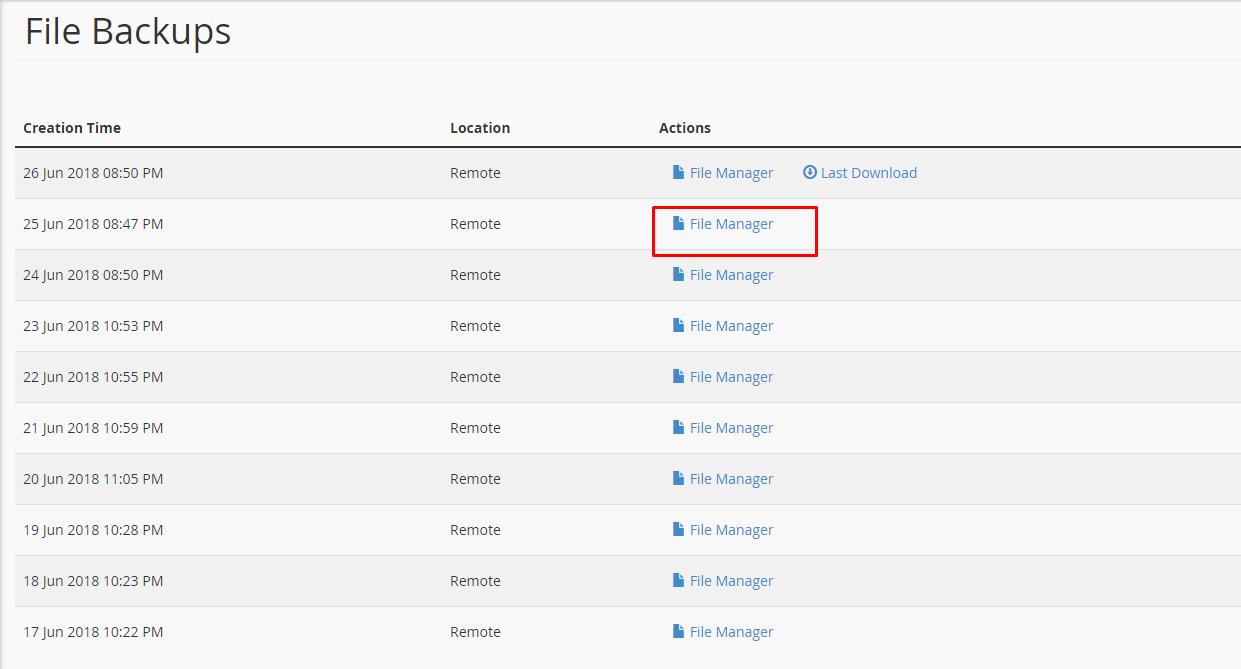
2. Here you can view the restore files and folders for your website from the last 30 days. You will see the list of all file backups available:

3. Click on the ‘File Manager’ icon next to the date you wish to restore from and select the files, or folders that you wish to restore. To restore your website content select only the public_html folder. The file will generate the right side on the window.
4. By clicking on ‘Download Selected Files’, you can generate a download for the selected files with a .tag.gz extension, the file will be generated under Downloads, which you can download to your local computer folder.

5. After downloading the files in your local PC, delete the current files present in the cPanel.
6. Click on the upload button on the top menu bar in a file manager. Choose the downloaded file and click on Upload button.

7. When the upload process has done, you can see the green bar with a complete message. Now go back to the file manager and extract the file you have uploaded.

Now the file backup is successfully restored. We hope this article will help you to restore the file backups. For more information, Follow us on Facebook and Twitter. For video tutorials, subscribe to our YouTube channel “ServerCake India”.