
Create an Email Signature in Roundcube on cPanel
Roundcube is a web-based IMAP email client. It is an open source software designed for standard web servers such as Apache, LiteSpeed, and Nginx. The signature for all outgoing messages can be created and saved in Roundcube which will be automatically added when sending a message. To create an email signature in Roundcube, follow the below steps
Step 2: Select the option ‘Identities’ in the settings
Step 3: The identities email ID will be displayed and click the email id
Step 4: In the edit identity settings, enter the necessary fields and create a new signature
Step 6: In the signature text box, enter the required signature
Step 7: Click the option “Save” button to save the signature
Step 1 Open RoundCube Webmail in cPanel Email account and click the “Settings” option in top right corner.
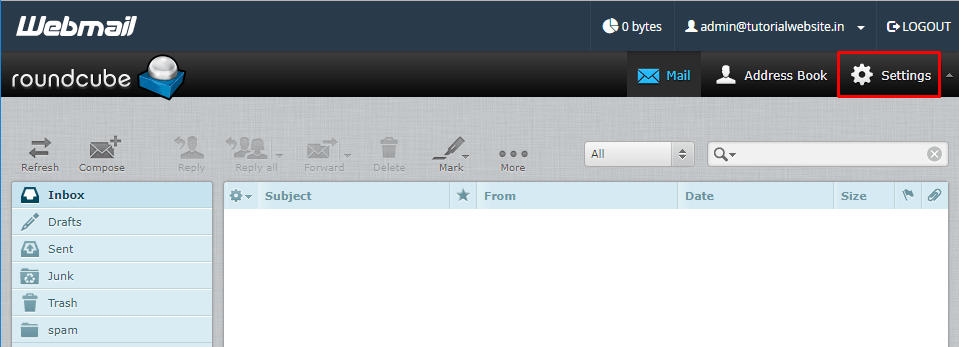
Click setting button on Roundcube groupware
Step 2 Click the “Identities” option in settings.

Select Identities menu
Step 3 It shows the identities email ID then you need to click that mail id.

Select the email account.
Step 4 It displays the edit identity settings box. Enter the necessary fields and change or set the required signature.

Fill the fields.
Step 5 Enter the necessary details in the text box and enable the HTML signature box.

You can enable the HTML signature option
Step 6 Enter your required signature details in this box.

Fill the Signature in Textual format or HTML format
Step 7 Click the “save” button to save the signature set for the particular email account.
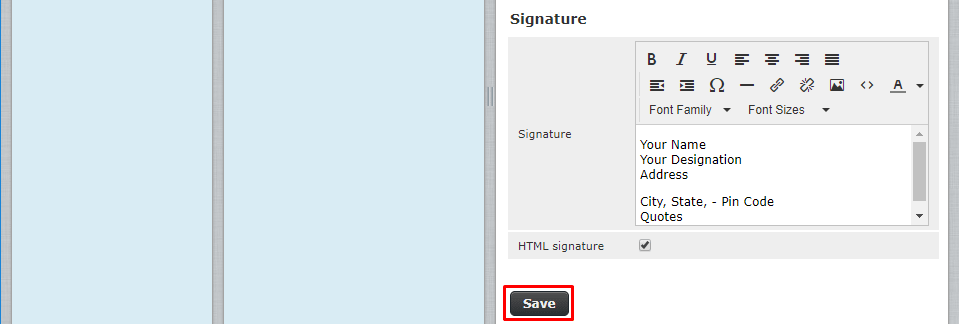
Save the setting
Step 8 The signature is saved successfully. When an outgoing email is sent, then the signature will be added automatically.

Compose the email to view the save signature