
Compress the Files in cPanel
File compression is used to reduce the file size and the compressed file is smaller than the original file. It is generally used for transferring the files from one computer to another computer, therefore, the file transfer will be faster. The received compressed file will be decompressed and used in a normal form. To compress the files in cPanel, follow the below steps
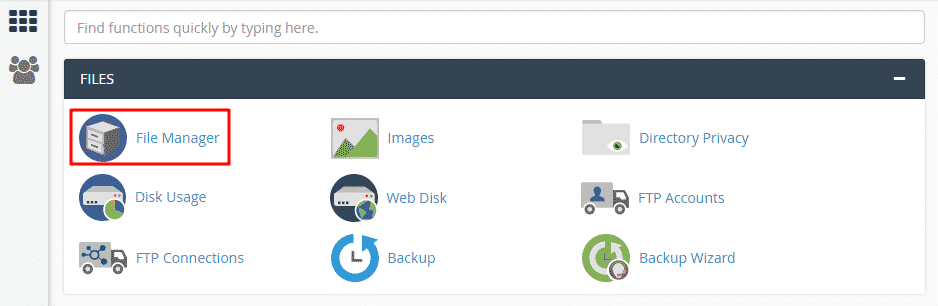
Step 2: Select File Manager under the section Files
Step 5: A dialog box for the process of file compression will be displayed
Step 1 Login into cPanel.
Step 2 Click the option File Manager under the files section.
Step 3 Select the needed file/folder to compress and click the ‘compress’ option from the list of menus at the top.

Select the file and click the compress option
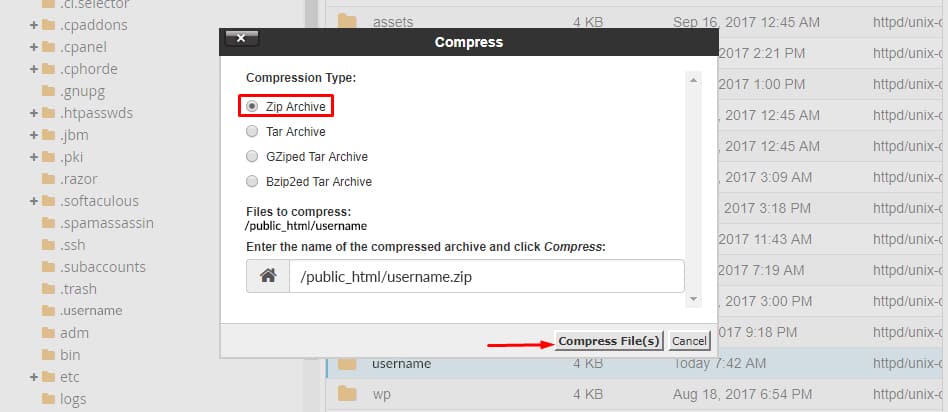
Step 4 Select the needed compress format and enter the name for the compressed file type. Then Click the Compress File(s) option.
Step 5 A dialog box for the process of file compression will be displayed.

It shows the process of compression
Step 6 Once the compression is done, it will display the compression result and click the ‘close’ button.
